November 4, 2011 in diy craft projects, homemade

![]() I don’t normally like to use the C word before December as it feels like I’m wishing the year away, but if you want to make things for Christmas, whether it’s decorations or gifts, then it’s a good idea to plan and start early.
I don’t normally like to use the C word before December as it feels like I’m wishing the year away, but if you want to make things for Christmas, whether it’s decorations or gifts, then it’s a good idea to plan and start early.
By coincidence the lovely team at Brigitte, Germany’s biggest women’s magazine, asked if I would be one of their Christmas ‘Bloggerei’, their list of the most creative bloggers! It’s quite an honour as I still feel very new to the blog world. It seemed the perfect opportunity to have some fun with clay and make some tree decorations.
For anyone with the German version of my book LieblingsDeko you can read the Brigitte.de post here.

These stylish and simple Christmas decorations are easy to make, cost very little and will look great hanging against the dark green of your Christmas tree or on a branch sprayed white.
The decorations are made with air-drying clay and are a variation of a project in my book. If you would like to know how to make them see page 14 of The Homemade Home which has step-by-step instructions. As they are handmade each one is individual and unique and they can be personalized with festive messages and family names.

I found the little branch in a pile of cuttings on the floor of my local park whilst on a walk with my family. I chose one from the pile with an interesting shape and simply sprayed it white when I got home along with some dried Oak leaves we had also collected from the floor of the wood.

I used snowflake stamps to press into the clay when it was wet (I bought my stamps from Muji). I stamped words in black ink onto some when they had dried, others I left plain. Use thin scraps of fabric, ribbon or string in festive colours to make the loops to hang them on the tree. I used strips of Liberty print fabric, red and white baker’s twine and ribbon from VV Rouleaux.


A 500g block of air-drying clay like Das will make approximately 50 decorations (depending on size, mine are about 9cms x 3cms).
I made a whole batch that I’m donating to my children’s primary school to sell at the school’s Christmas fair.
I help with the gifts stall every year and last night some of the other mums from my son’s class came over to my house for a ‘making night’ to make things to sell on the stall – an evening of crafting and chatting over nibbles and a glass of wine. It’s a lot of fun, a great way to build friendships, get involved in the local community and raise money for the school.
Are you planning to make anything for Christmas?
Comments: 40 Leave a comment
August 4, 2011 in diy craft projects, homemade

I made this little party skirt one Sunday as a gift for my four year old daughter from bits and bobs I had in my craft cupboards.
It is made from some beautiful oyster silk fabric by Bennison that I had left over from a photo shoot and had been wondering what to do with. As it’s silk it is really for special occasions only. She looks so sweet wearing it – it is VERY girly, which she naturally loves!
It is very simple to make and only took a couple of hours to complete. You can use any fashion or thin furnishing fabric for a skirt like this. I usually use a ribbon for the waistband, but for this skirt I used elastic and then added a ribbon bow and button as a detail. I already had both of these in my haberdashery stash.

This skirt is a variation of the Child’s Ribboned Skirt project in The Homemade Home. There are illustrated step-by-step instructions in the book if it inspires you to have a go. The photo below is from the book and is by the talented Penny Wincer who shot all the lovely photos. (© Cico Books)

And when my daughter out grows it, we can hang it up and display it in her bedroom. Who knows, maybe she will keep it for the future and hand it down to another generation to enjoy.
Comments: 5 Leave a comment
July 29, 2011 in diy craft projects, homemade

This is a lovely way of wrapping up gifts which involves using very simple and accessible brown paper with string and ribbon. These are actually copies of my book that were sent as gifts when it was first published and I took time to personalise each one.
Add bits and bobs you have around the house to these staple ingredients and the result is unique. The wrapping turns a potentially simple gift-wrap into a very special one and once unwrapped, the tags and pictures can be kept by the recipient.
To begin, I wrap the parcel up as neatly as I can using double-sided tape to stick down the flaps either end and in the centre. I then tie the string, ribbon or sequins around the package and add the rest piece by piece.

The keys were left over from another project, where I had sprayed them with an off white matt-finish paint. These are old keys but they’re not vintage or antiques, just cheap everyday keys. A lick of paint makes all the difference.
The postage stamps were from a big bag of stamps I bought at a flea market and are always great to add interest to projects. I always keep little off-cuts of ribbon too, which are perfect for tying tags or little bows and knots with but add a splash of colour and interest. The sequins add some glamour and are a contrast to the utilitarian brown paper.

I embroidered the flowers on water colour paper with a sewing machine using the embroidery foot and stitched them freehand without a pattern. If you’re not confident with that you could pencil draw or trace a flower onto paper and follow it with the sewing machine. If you want to learn this technique there is an illustrated step-by-step project using it called ‘Stitched Portraits’ on page 110 of The Homemade Home.
Adding tags to write your gift message, writing a poem or scribbling some words makes it personal and fun!
Comments: 9 Leave a comment
July 19, 2011 in diy craft projects, flowers

This is a very simple idea that can transform a simple vase into something unique and individual to you and your home. The great thing is it isn’t permanent and you can change it to suit your room and decor as you wish.
First step is to raid your fabric box. You could choose similar tones as I have here, or mix them up and go a little bonkers with your fabric choices with patterns and bright colours to match your flower arrangements. If you have any fabric leftovers from other projects then that can work well, matching your vase to a cushion in your lounge or a throw on your bed for instance. All the fabrics I used here are leftovers from other projects so match things I have all around the house which makes the vases versatile.
I then raided my kitchen cupboards and chose a variety of sizes of vase and I also used ordinary column drinking glasses which are perfect too. It works best if they have an even column or rectangular shape as they are easier to wrap (shaped or conical vases are trickier). They are all simple, classic glass vases that I have bought over the years from places like Ikea, Habitat and Sainsbury’s.

To wrap them, measure the height and circumference of your vase. I use a fabric tape measure for this, wrapping it around the vase or glass and adding 10mm – 20mm for the overlap. This will give you the dimensions you need to cut out a rectangular piece of fabric that will wrap around with a little bit of an overlap to help fix it on.
Place some double-sided sticky tape along each short edge of the fabric. Peel off the backing of one strip and stick this to the glass, then wrap the fabric around and stick the other end down back on to the fabric where it was first fixed.
If you like, wrap some string or ribbon around the middle and your new look vase is complete, just add water and flowers!

It works for all sizes of vase – as long as you have enough fabric!

I wrapped string around this one in a similar way to the candle gift idea I posted a couple of months ago.

All of the flowers and leaves in the photos above are just picked from my garden but you could easily choose a fabric to go with a wonderful bouquet of fresh flowers.
You have to be a little careful when filling and emptying the vases not to get the fabric too wet or get dirty flower water down them, but mine have remained really quite clean. If this does happen you can easily peel the fabric off and wash it or try a different fabric for a new look. The sticky residue from the tape can usually be scrubbed off with soapy water but if it won’t budge then a turps-based solvent or white spirit can help remove it if you want to return it to its original look.
It works for large vases too and can be a great way to hide unsightly stems.

A quick and simple idea that allows you to match your vases to your decor and that costs next to nothing!
Comments: 13 Leave a comment
July 8, 2011 in diy craft projects, homemade

When you have a special occasion or big party to go to, making a new necklace or brooch is a great way to re-vamp or glam up a favourite outfit. I made this choker necklace to match a dark blue party dress of mine. I love the dress but wanted to give it a new look as I’ve worn it a lot.
This choker is a simple piece of grosgrain ribbon that I hemmed at the ends and added simple ties to the back to fasten it. It’s embellished with embossed birds made of silver foil card, old buttons, sequins and metal snap fasteners – all simply stitched on. I then finished it with an antique brooch I had picked up at a flea market. The blue suede leaves I bought from one of my long-time favourite haberdashery shops VV Rouleaux – probably the best ribbon shop in the world.
It didn’t take long to make and made my outfit feel brand new. Plus you get the added benefit of people asking where you got it from and you can say “I made it!”
Have a fun weekend everyone!
Comments: 1 Leave a comment
July 5, 2011 in diy craft projects, homemade, interior styling

Here’s a little lamp I made that sits in my studio and makes me smile, so I thought I’d share it with you. It also shows how the stripped back lampshade idea works as well for little shades on table lamps as it does for larger shades, like the one made for the Decorate book launch.
I originally made this shade for an Elle Decoration magazine story I did 7 or 8 years ago and still really like it. If you look through my tearsheets you’ll come across a picture of it’s original incarnation. I bought the blank wire frame new and then hand cut and embossed silver leaves from metal craft sheeting and wired them to the bottom of the frame along with some crystal beads. You could also strip an old lampshade and do something similar.
The lamp base is vintage and I bought it from a flea market last year whilst on holiday in Croatia. I had it re-wired by an electrician when I returned home.

I bought the crystal bead bulb cover years ago and have not been able to find another one since – if you know anywhere that sells them please let me know! They’re great for diffusing the light from the naked bulb. I perched the silver bird on top for a little bit of fun, it seemed the perfect home.
The antique mirror frame was a buy from a little curiosity shop and the little girl in the photo is my Mum when she was a toddler – sweet!
Comments: 6 Leave a comment

A place to share my work and the things I love: interior styling and great design; fine art and contemporary craft; exciting new products and flea market finds; handmade and homemade; celebrating the old and embracing the new; creativity, family and fun. The things that I believe make your house a home.

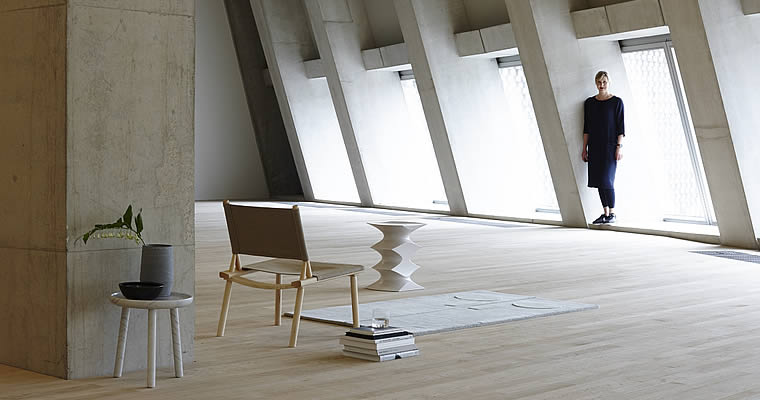
 Line Up contemporary craft exhibition, curated by Sania Pell, at Flow Gallery, 1-5 Needham Road
London, W11 2RP.
Line Up contemporary craft exhibition, curated by Sania Pell, at Flow Gallery, 1-5 Needham Road
London, W11 2RP.
 View Sania's interiors, food and table top and children's lifestyle photographic styling portfolio.